What Is Overhang Climbing and How to Tackle It
Learn why overhang climbing drains beginners fast and how high feet, hip rotation, core tension, and straight arms change everything on steep terrain.
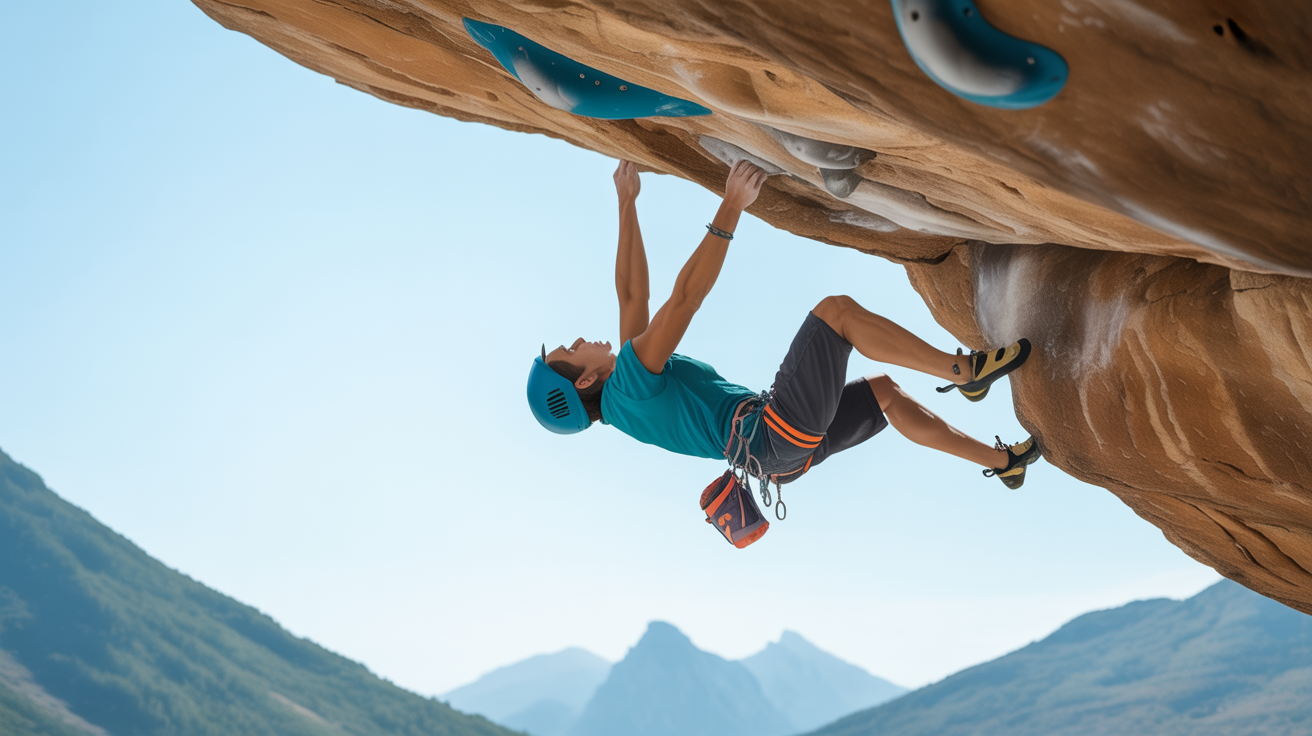
Overhangs are the section of the gym wall that leans past vertical, tilting toward you as you climb up. For most beginners, the first encounter with one ends the same way: arms pump out in seconds, feet swing off the wall, and the whole body peels away. It feels like a strength problem, but in most cases it is a positioning problem.
Understanding why overhang terrain behaves the way it does helps you stop fighting it.
Why Overhangs Feel So Different from Vertical Walls
On a vertical wall, gravity pulls you straight down into your footholds. Your feet carry a large share of your body weight almost automatically. The wall itself is close to your hips, so you stay balanced without much active effort.
Tilt that wall past vertical and things shift. Now gravity still pulls you down, but the wall is angling away from your feet. Your body wants to rotate outward, hinging at the hands like a barn door swinging open. Beginners respond to this by gripping harder and pulling more with the arms, which accelerates forearm pump and usually fails within a few moves.
The core issue is that on an overhang, you have to actively maintain contact between your feet and the wall. Nothing does it for you. Every kilogram you keep on your feet is a kilogram your arms do not have to hold.
The Four Things That Keep You on an Overhang
High feet. On steep terrain, your footholds need to be as high as possible before you move your hands. This shortens the distance between your hips and the wall, reducing the leverage that pulls you away. If your feet are low and your hands are high, your body hangs like a pendulum and your arms take almost all the load. Bring those feet up first, then reach.
Hip rotation into the wall. Keeping both hips square to the wall on an overhang is a common beginner error. Instead, rotate one hip toward the wall by flagging a leg or dropping a knee (a drop-knee move). This brings your center of mass closer to the surface, reduces the outward pull on your arms, and gives you more reach. The key is that your hip moves toward the wall, not away from it.
Core tension. Your core acts as the link between your upper and lower body. On a vertical wall you can get away with a relaxed midsection. On an overhang, a soft core lets your hips sag away from the wall even when your hands and feet are in the right place. Think about drawing your navel toward your spine and keeping that connection active through each move. This is what climbers call body tension, and it is the piece beginners most often skip.
Straight arms. Bent arms on a rest mean your biceps are under constant load. On an overhang this burns out your forearms faster than almost anything else. Whenever you are not actively pulling through a move, hang on straight arms. Lock off only at the moment of movement, then straighten again. Resting on straight arms is a skill worth practicing on its own before applying it to steep terrain.
A Progressive Drill Sequence for Building Overhang Confidence
These drills are designed to be done on low-angle overhangs (roughly 110 to 120 degrees) in a gym setting before moving to steeper terrain. They should feel challenging but controlled.
Drill 1: Static high-foot holds. Choose a juggy overhang route two or three grades below your current level. Climb it normally, but before every hand move, pause and raise your feet as high as you can on the current footholds. Hold for two seconds, then move your hands. This builds the habit of feet-first sequencing before you think about reaching.
Drill 2: One-arm hangs on a jug. At a low jug on the overhang section, hang on one arm with the other hand resting on your hip. Keep the hanging arm straight. Hold for five seconds, rest, repeat on the other side. This teaches you what a real straight-arm rest feels like when the wall is angled away.
Drill 3: Drop-knee traversing. Traverse sideways across an overhang using exaggerated drop-knee positions on every other move. Pause in each drop-knee long enough to feel your hip move toward the wall. The goal is not speed but body awareness. Hip position on steep terrain is one of the highest-return skills in climbing.
Drill 4: Footwork focus laps. Pick a short overhang problem and climb it with the goal of placing every foot silently and precisely. No scraping, no repositioning. Quiet feet are harder to maintain when you are also managing body tension, so combining both gives you a real training stimulus without adding intensity.
Take genuine rest between laps. Overhang climbing taxes your fingers and forearms more than vertical climbing, and tendons adapt more slowly than muscle. Three to four quality laps with full recovery is more useful than grinding through ten sloppy ones.
Common Mistakes and What to Do Instead
Barn-dooring. This happens when your feet cut loose and your body swings out to one side. The fix is usually to flag a leg on the opposite side to counterbalance. Using your legs as counterweights is a skill that transfers directly from vertical climbing to steep terrain.
Reaching too far. On an overhang, a long reach past a stable high-foot position drops your hips and unweights your feet. Shorter moves with high feet are usually more efficient than stretching for the next hold.
Pulling constantly. Some beginners treat every move on an overhang as a muscle-up. In reality, most moves involve a brief pull through the motion and then a return to straight arms. Think of it as a rhythm: pull, lock off for a moment at the top of the move, place the next hand, then straighten.
A Note on Training Load
Overhangs put more strain on finger tendons, shoulder structures, and elbow flexors than vertical climbing does. If you are new to the gym, spend several months on slabs and vertical walls before spending significant time on steep terrain. When you do start building overhang volume, increase it gradually. Soreness in the forearms after a session is normal; sharp pain in a finger pulley, elbow, or shoulder is a signal to stop and rest.
Aggressive finger training tools, like hangboards, are not appropriate for beginners. A qualified coach or experienced gym instructor can help you assess when additional training load makes sense for your current level.
Frequently Asked Questions
Why do my feet keep cutting loose on overhangs? Foot cuts happen when your hips are too far from the wall and your legs have nothing to push against. The fix is almost always higher foot placement combined with hip rotation toward the wall. Practice the high-foot pause drill until the habit is automatic.
How do I stop getting pumped so fast on overhangs? Two things help most: resting on straight arms at every opportunity and climbing more slowly. Beginners often rush through moves when they feel the pump coming. Slowing down and finding rest positions, even brief ones, extends how long you can stay on the wall.
Is body tension the same as core strength? They are related but not identical. Body tension is the active skill of contracting your core and keeping your body rigid while climbing. Core strength is the underlying capacity. You can improve body tension through intentional practice on the wall, even before your baseline core strength is high. Over time, both develop together.
Should I train on overhangs every session? Not at first. Two sessions per week on overhang terrain with a day of rest between them gives your tendons time to recover. Vertical and slab climbing between those sessions keeps your technique sharp without adding more load to the same structures.
When should I ask a coach about my overhang technique? Any time you feel stuck, start experiencing recurring discomfort, or want a structured training plan. A session or two with a qualified instructor at your gym will give you personalized feedback that no article can replicate. Overhang movement patterns are best learned with someone watching your body position in real time.