How to Clip Quickdraws When Lead Climbing
Learn gate orientation, the pinch and snap techniques, and how to avoid back-clips and z-clips before your first lead climbing attempt.
Clipping quickdraws is one of the last skills a climber learns before stepping onto a lead route. Until now, someone else has been handling the rope management. On lead, that job is yours, and it happens while you are holding on, potentially pumped, and usually off-balance. Getting the mechanics right before you step onto a real lead route matters.
This article walks through what a correct clip looks like, the two standard methods for executing it, and the two mistakes that can turn a clip into a hazard. Work through these concepts at home or at the gym at ground level before you attempt a lead certification course. A certification course, offered at most climbing gyms, is where you should learn this skill properly under a trained instructor's supervision. Nothing written here replaces that.
Gate Orientation and Why It Matters
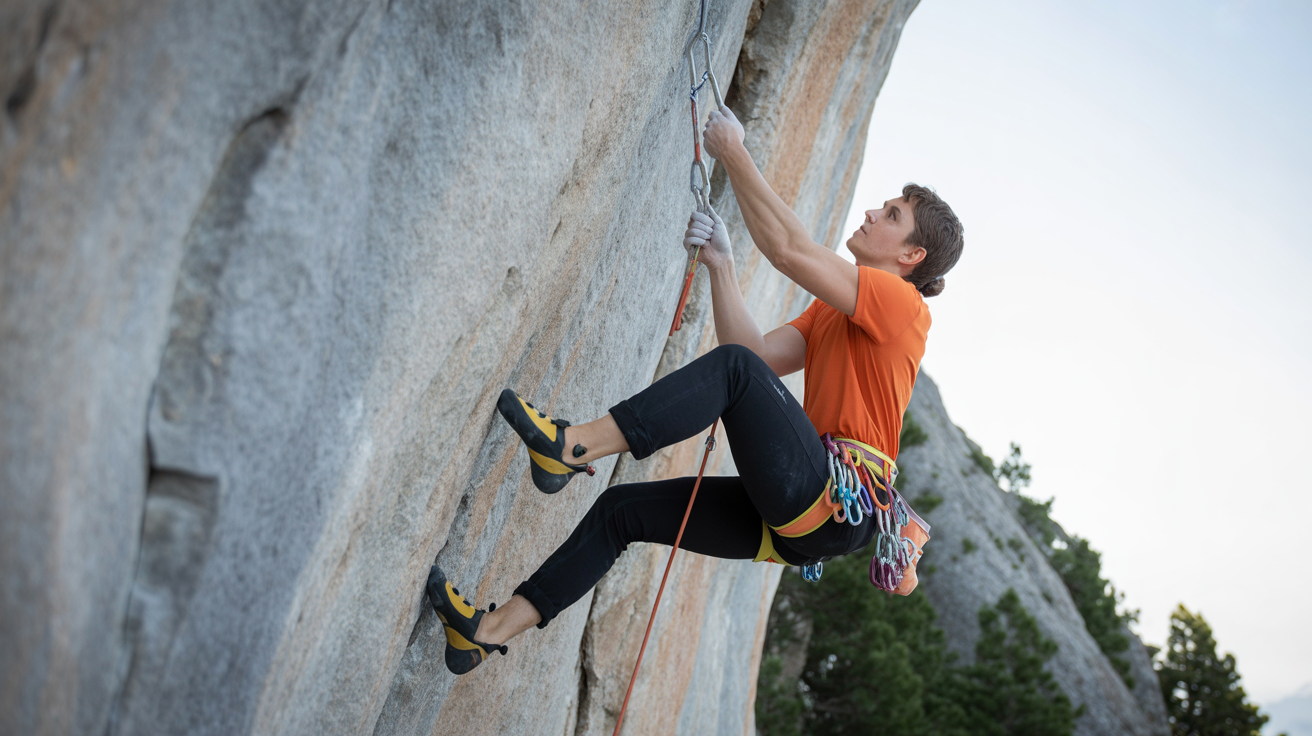
A quickdraw is two carabiners connected by a sewn dogbone. The bottom carabiner (the rope-end biner) should be oriented so its gate faces away from the direction of the rock. On a typical sport route, the bolt is to your left or right as you move upward, so the rope-end gate opens away from the wall.
The reason: if the rope presses against the gate rather than the spine, there is a small chance of a gate flutter or an unweighted gate during a fall. Manufacturers of UIAA/CE-certified gear design carabiners to handle loads on the spine, not the gate. Most gyms install quickdraws for you on indoor routes with gates already facing the correct direction, but on outdoor routes you will place your own draws and need to set them deliberately.
A related concept is gate direction on the bolt-end biner. That carabiner clips into the bolt hanger and can be oriented independently. Many climbers match both gates opening in the same direction; others prefer opposite. The universal rule is that the rope-end biner gate faces away from the rock.
The Two Standard Clipping Techniques
You will encounter two main methods. Most climbers settle on whichever one their hands naturally favor. Practicing both gives you flexibility when a hold forces your hand into an awkward position.
The Pinch Clip
Hold the rope between your thumb and index finger, with the tail of rope (the strand running down to your belayer) resting against the pad of your thumb. Push the rope forward against the gate with your thumb until it snaps through. Your fingers stay on the outside of the biner throughout. This method works well when you can get your hand close to the carabiner from above.
The Snap Clip
Hold the rope between your middle finger and index finger, with your index finger hooked around the spine of the carabiner to stabilize it. Use your middle finger to push the rope through the gate from below, snapping it in. This method is often more natural when reaching up to clip from below, which is the position you are usually in.
Both techniques require one hand to stabilize the carabiner while the other feeds the rope. Letting the carabiner spin freely while you clip is a fumbled clip. At a gym, you can practice the motion with a draw clipped to a harness loop before ever leaving the ground.
Back-Clips: What They Are and Why They Create Risk
A back-clip happens when you thread the rope through the carabiner in the wrong direction. Instead of the live rope (the strand leading up to your tie-in knot) passing through the front of the gate, it passes through the back. The result looks almost identical to a correct clip, but if you fall, the rope can push the gate open and unclip itself.
To check for a back-clip, trace the rope from your tie-in knot down to the quickdraw. The strand coming from your harness should exit the carabiner on the side closest to the rock. If it exits on the outside, you have a back-clip. Unclip and redo it.
Back-clips happen most often when a climber clips in a hurry or clips below their waist where the rope is trailing at an odd angle. Slowing down to verify the clip when you are learning is worth the extra second.
Z-Clips: A Different Rope Management Error
A z-clip is a rope management error rather than a clipping direction error. It occurs when you clip a lower section of rope into a higher bolt, creating a Z shape in the rope between two bolts. The rope below the top bolt passes through the bottom bolt twice, meaning you are dragging both strands with every move upward. The drag is immediately noticeable, and in some positions the rope can lock up entirely.
Z-clips happen when a climber grabs rope from below the last clipped bolt instead of from above it to make the clip. When you reach for rope to clip, always grab from the strand hanging between your harness and the highest clipped bolt, not from the slack below that bolt.
If you are mid-route and feel extreme drag, stop and check whether you have z-clipped. Climb back down slightly if needed, unclip the top draw, and reclip with the correct section of rope.
Practicing Before You Lead
The physics of lead clipping can be absorbed before you leave the ground. Clip a quickdraw to a loop on your harness, stand on the floor, and work through both techniques with a section of rope until the motion feels automatic. Then practice under slight fatigue: do a short set of pull-ups or hang for thirty seconds, and immediately practice the clip. Pumped forearms change how much grip you have on both the rope and the carabiner.
At the gym, many facilities offer dedicated lead practice walls with a mock bolt at low height where you can simulate the clip from a standing or slightly elevated position without the consequence of a real fall. Use them.
Clipping well also comes from good body positioning. Standing in a high step with your hip close to the bolt gives you a stable base and a free hand to clip with. Reaching up and clipping from a dead hang burns energy fast. Route-reading, footwork, and clipping mechanics all reinforce each other, which is one reason a lead certification course covers them as a package rather than in isolation.
Before any lead attempt, complete a partner check with your belayer and verify your figure-eight follow-through knot. Make sure your belayer is ready and using a device appropriate for lead belaying. Lead belaying has different timing demands than top-rope belaying, and both partners need to have completed their respective lead certifications before the first clip is ever made.
Frequently Asked Questions
Which direction should the quickdraw gate face?
The rope-end carabiner gate should face away from the rock. On a typical sport route this means the gate opens to the side that does not contact the wall. This keeps the rope loading on the spine of the carabiner, which is where the rated strength is.
What happens if I back-clip?
A back-clip means the rope passes through the carabiner in the wrong direction. If you fall with a back-clip, the rope can lever the gate open and unclip from the draw entirely. It is one of the most common beginner lead errors and is fixable as soon as you spot it: unclip and reclip with the rope passing in the correct direction.
Do I need a lead certification before trying lead climbing?
Yes. Most climbing gyms require a lead certification before you are permitted to lead or lead belay on their walls. The certification covers clipping technique, lead falls, lead belaying, and communication in a supervised setting. The concepts in this article are intended to help you prepare for that course, not to replace it.
What is the difference between the pinch clip and the snap clip?
The pinch clip pushes the rope through the gate with your thumb, with the rope tail resting against the thumb pad. The snap clip uses your middle finger to push the rope through from below while your index finger stabilizes the carabiner spine. Both are valid; the right one depends on your hand position relative to the bolt.
How do I know if I have z-clipped?
You will feel significant rope drag immediately. Trace the rope from your harness downward: if it passes through the top bolt and then goes back down and through the bolt below, you have a z-clip. Descend slightly, unclip the top draw, and reclip using the correct strand of rope (the one running from your harness to the highest bolt, not the slack below it).